Many people find jacking up their low car daunting, but it doesn’t have to be. Jacking up a low car can be done safely and easily if you know the correct steps and use the appropriate equipment. This blog post will discuss how to properly jack up a low car, including the recommended tools and safety precautions that should always be followed when lifting the vehicle. So, let’s get started. Instruction on How to Get a Jack Under A Low Car
Knowing how to get a jack under a low car is key to performing any necessary maintenance or repairs safely and securely. Here, we will walk you through each step of getting your car lifted properly so that you can take care of any issues quickly and confidently. At GigaWheels, you can find details regarding car jack. Tools Needed for Lifting Low Cars
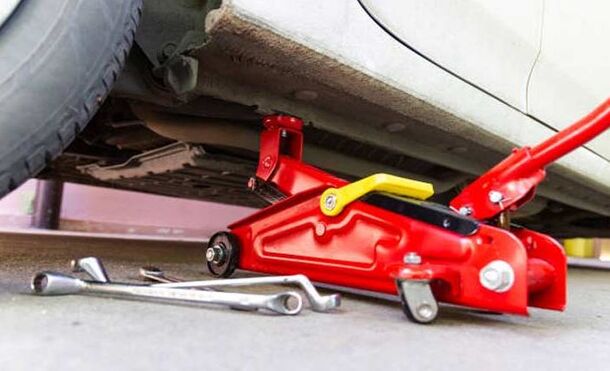
Before you begin jacking up your low car, you’ll need some essential tools that will make the job easier and safer. These include a floor jack designed specifically for automotive use; they come in various types but are typically powered by air or hydraulic pressure; ramps that can be used in place of jacks; wheel chocks; and wrenches or other hand tools in case you need to remove certain parts during maintenance or repairs. Now that you have all your tools together, it’s time to start lifting. The following steps will help you get a safe and secure lift on your low-riding vehicle. Step 1: Positioning Your Vehicle
First, you’ll want to position your vehicle, so it is stable before lifting it off the ground. This includes ensuring there is no debris around it (such as rocks or branches) that could cause instability while raising it, positioning it on flat terrain if possible, and avoiding inclines or declines if possible, as this could make jacking up more difficult. Additionally, if you plan on using ramps rather than a jack for lifting your car off the ground, make sure they are firmly in place before beginning. Step 2: Locating Your Jacking Points
Once your vehicle is properly positioned and ready for lifting, you’ll need to locate its designated jacking points these are reinforced metal ribs at either side of the front wheels (or rear wheels, depending on where you plan on doing repairs). Make sure not only that these points are easily accessible but also clear from any debris, such as dirt or gravel, which may interfere with the proper positioning of your jack/ramps later on. Once everything is cleared away from these points, proceed to step three. Step 3: Positioning Your Jack/Ramps underneath Vehicle
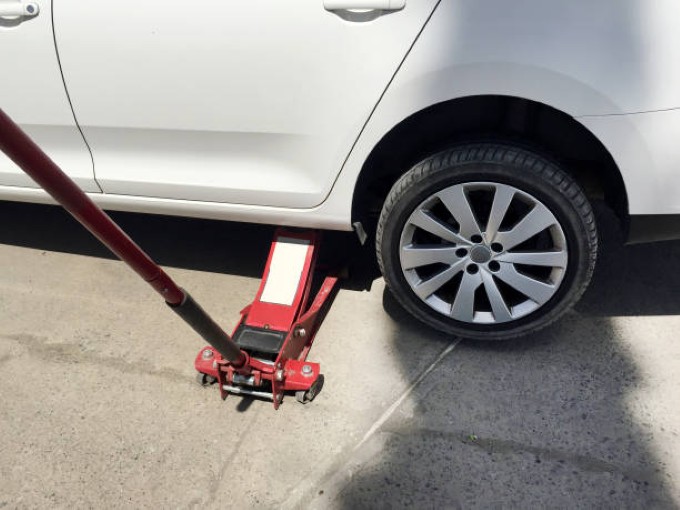
Now that you’ve located both jack points, it’s time to position either a floor jack underneath both sides near each point OR ramps over each side, so they support the entire weight of the vehicle while raised off the ground. If using a floor jack, ensure that both sides are securely positioned underneath each point before attempting to pump them into place use caution when pumping as overexertion may cause damage to underside components such as exhaust pipes, etc. If using ramps, assist in ensuring they are placed beneath both sides of the vehicle before beginning the pumping process. Also, ensure wheel chocks are in place behind wheels whenever using ramps. Step 4: Pumping Until the Vehicle Is Raised Off Ground
Once everything is securely positioned beneath the vehicle (either steps 2-3), now comes the time for the actual lifting process. Using either floor jack/ramp, begin lifting until vehicle is high enough for repair work (usually about one foot above ground level). Make sure not to exceed the manufacturer weight limit/pump too hard when creating a lift as this could damage underside components -stop pumping once desired height has been reached, and then proceed to the next step. Step 5: Perform Necessary Repairs/Maintenance
After reaching the desired height, now, it’s time to perform necessary repairs/maintenance. Ensure everything underneath is clear, and then begin replacing parts needed remember always to wear appropriate safety gear such as gloves/mask when handling complicated components like engines, etc. Then replace the faulty part(s) once complete, replace any protective covers which were removed prior & recheck the entire area making sure nothing was missed during repair work. Finally double, check everything is secure & back away lowering it down onto a flat surface before driving away. Safety Tips When Lifting Low-Riding Vehicles
To ensure your repairs or maintenance are done safely and efficiently, it’s important to follow the proper protocols for lifting these cars. Here are eight essential safety tips to keep in mind when working with low-riding vehicles. 1. Always ensure proper safety equipment, such as gloves, masks, and protective eyewear, when performing repairs or maintenance underneath the vehicle. 2. If using ramps instead of a jack, secure wheel chocks firmly behind each wheel before beginning repairs/maintenance. 3. Make sure the parking brake is engaged, and the transmission is in park or neutral before lifting a car with a jack. 4. When operating a floor jack, ensure it’s on level ground and firmly secured before raising the vehicle. This will help ensure that the car’s weight won’t cause the jack to slip. 5. When raising a low-riding vehicle with a floor jack, use caution when positioning it, as the lower clearance of the car can lead to pinching or other damaging forces if not done correctly. Use common sense and be careful. 6. After successfully getting your jack under the car, raise the vehicle no more than necessary. The higher you go, the weaker the jack’s support becomes, and it could fail suddenly without warning. 7. Double-check that all equipment is secure before working under a low-riding car; this includes ensuring all tools are accounted for and that nothing is within reach of the vehicle. Always use caution when working on lowered cars, and remember to keep safety in mind at all times. This way, you can get your car repairs done quickly and safely. ConclusionRemember to take all necessary safety precautions when jacking up a low car, such as using wheel chocks and following manufacturer instructions for any tools used. With proper preparation and knowledge, you can quickly and safely lift and lower the vehicle to perform maintenance or repair work. We hope we’ve given you all the information to start lifting your low car.
0 Comments
Leave a Reply. |