|
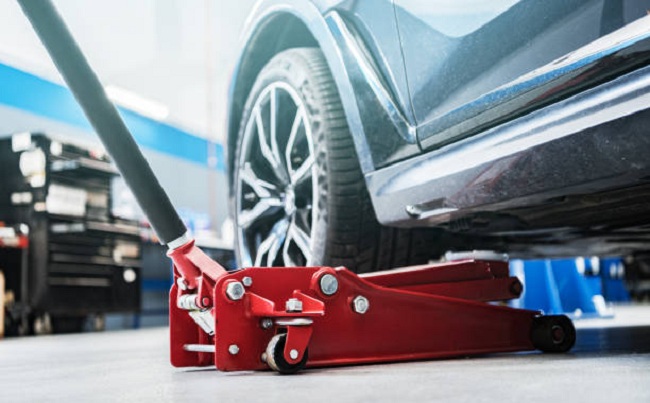
A 2-ton floor jack is an essential tool for anyone who works with cars and having the right one can make a big difference in how easy and safe it is to lift vehicles. But with so many different models available, you may wonder if a 2-ton floor jack is enough for your car. When it comes to lifting your small vehicle, a 2-ton floor jack is often enough for most cars and light trucks. Here, we’ll explain what you need to know to determine if a 2-ton model suits you. Advantages and Disadvantages of 2-Ton Floor Jacks
Understanding the advantages and disadvantages of 2-ton floor jacks is essential before deciding if they suit your vehicle. Here are some of the pros and cons of using a 2-ton model: Advantages of a 2-Ton Floor JackMobility:One of the main advantages of this type of floor jack is its portability. These jacks are small, lightweight, and have wheels for easy maneuverability around the garage or shop. This allows you to quickly move the jack from one location to another, making it suitable for jobs on different vehicles or in other locations. Versatility:Another advantage is their versatility. These jacks can be used for various lifting tasks, such as lifting vehicles to change tires, doing oil changes, or replacing parts on a car. They can also raise other heavy objects, such as furniture and appliances. Safety:A 2-ton floor jack provides more security than traditional jacks because they typically have safety features that reduce the risk of injury. For example, some models will include overload protection that prevents the user from exceeding the weight capacity of the jack or an overload valve that stops further lifting if too much pressure is applied during use. Disadvantages of a 2-Ton Floor Jack
Weight Capacity: While two tons may sound like a lot of weight capacity, it may not be enough for some heavier applications, such as trucks or SUVs with larger engines and other components that add extra weight when lifted off the ground. Size:While these jacks are relatively small and lightweight compared to other types on the market, they still take up quite a bit of space in your garage or shop due to their larger size than some other types available. Cost:While 2-ton floor jacks are generally quite affordable compared to more giant jacks with higher capacities, they still cost more than traditional hydraulic bottle jacks, which offer similar performance but at lower prices points Factors to Consider When Choosing a 2-Ton Floor JackNow that you know the pros and cons of 2-ton floor jacks, here are some things to consider when selecting a jack for your vehicle: Weight Capacity: As mentioned before, the most crucial factor is the jack's weight capacity. Make sure it can handle the weight of your vehicle or whatever object you intend to lift with it. Portability:Floor jacks are usually relatively portable and convenient to use. However, some models may be heavier or bulkier than others, so consider how much portability you will need before making your purchase. Ease of Use:Consider the ease of operation for whichever jack you choose. Some may require more physical strength to operate than others. Additionally, look into the type of release valve it has manual or automatic as this will affect how easy it is to lower the load once it’s been lifted. Durability:Ensure your floor jack is made from quality materials that can withstand heavy use and wear and tear over time. Also, ensure the wheels and other parts are in good condition. Price:Last but not least, consider your budget before purchasing a floor jack. Depending on the weight capacity, materials used, and brand name, jacks can vary significantly in price. Before buying a model, do your research to determine whether it is right for you and within your budget. With all these factors in mind, deciding which 2-ton floor jack is best for you and your vehicle should become much more accessible. With proper care and maintenance, any decent-quality model should last you for many years. ConclusionChoosing the right floor jack for your vehicle can be a difficult task. 2-ton jacks offer plenty of benefits but also come with some drawbacks. Before investing, consider factors such as weight capacity, portability, and ease of use, durability, and price to ensure the model you purchase meets all your needs. With careful selection and proper care, any decent-quality 2-ton floor jack should last many years.
0 Comments
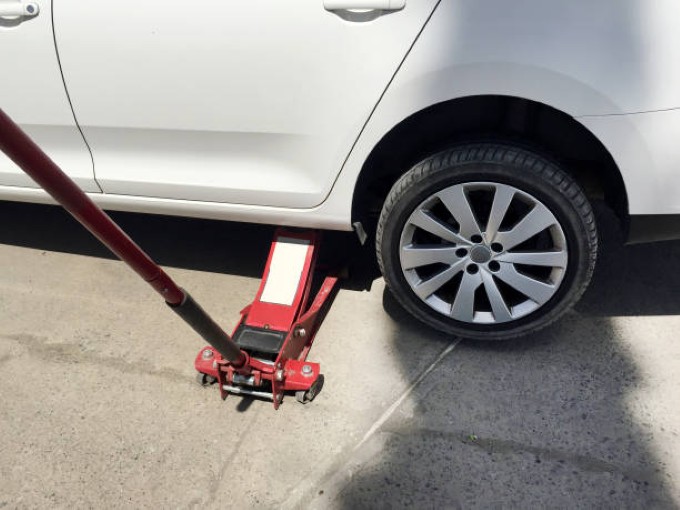
Are you wondering if you can jack up a car on an incline? This is a question many auto enthusiasts want to know the answer to, as it can be pretty challenging to jack up a car on an incline. Jacking up a car on an incline would seem impossible due to the angle of the incline and the force needed to lift it. However, it is possible if done safely and properly. In this blog post, we'll discuss how to safely jack up a car on an incline and what precautions you should take to do so successfully. Step-By-Step Instructions for Jacking Up a Car on an Incline
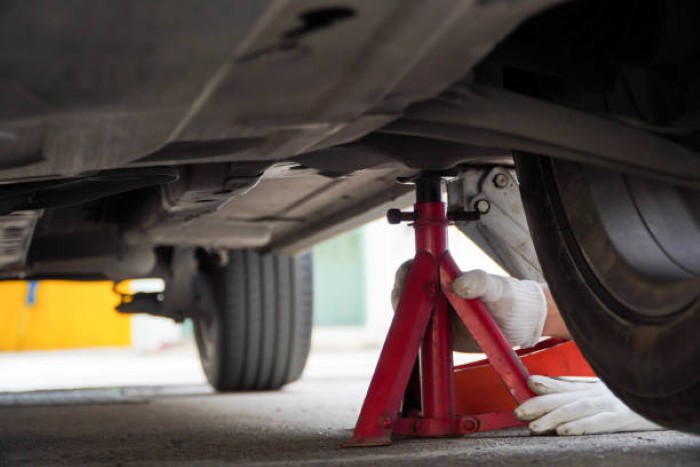
If you need to lift a car on an incline, then it is important to know the proper procedure for doing so. Jacking up a car on an incline is not a difficult process, but it does require some special precautions to make sure that the vehicle is stable and safe. Here are step-by-step instructions on proper lifting a car up an incline. Step 1: Park the Car Securely and Turn Off the EngineBefore attempting to lift the car, ensure that you have turned off the engine and that the vehicle is securely parked so that it won't roll away while being lifted. It’s also a good idea to check or block all four tires for additional safety. Step 2: Locate Lifting PointsDepending on your vehicle and the type of jack being used, there may be different permissible lifting points. Generally speaking, these will be points located near wheel hubs or suspension components which can support the weight of your vehicle when jacked up. Make sure to carefully read any instructions included with your jack before proceeding. Step 3: Prepare the Jack and Position It Correctly Under Your VehicleOnce you have located suitable lifting points, carefully place your jack underneath them according to any instructions provided by its manufacturer or operator’s manual. Make sure that you have enough room around each lifting point so that any adjustments can be safely made while jacking takes place without hitting other objects or parts of the vehicle itself. Step 4: Raise One Side at a Time until Desired Height AchievedWhen raising your vehicle on an incline, it's important that you only do one side at a time to ensure stability and safety at all times during operation and particularly when transferring weight from one axle onto another. Make sure not to raise either side of your vehicle too high, as this could cause instability and risk injury or property damage due to accidental slips from excessive heights. Step 5: Place Chocks underneath Wheels after RaisingOnce both sides of your car have been raised to their desired height, place chocks (or blocks) underneath both wheels of each axle to prevent slipping while working beneath your vehicle, regardless of whether it’s sitting on level ground or an incline. This will help keep everything secure while adjustments are made before returning the car to solid ground again. Finally, always remember that regardless of whether you’re working with cars vertically or horizontally, safety should always be paramount take every precaution necessary throughout this entire process. Safety Precautions When Jacking Up a Car on an InclineWhen attempting to jack up a car on an incline, there are some essential safety precautions that you should take. Follow these steps to ensure that you are jacking your car up correctly and safely. 1. Put the car in park and set the emergency brake to prevent the car from rolling. 2. Place chocks or wooden blocks behind each tire on the downhill side of the incline for additional security. 3. Make sure that the jack is on a solid, level surface and is properly rated for the weight of your car. 4. Slowly crank the jack until it has slightly lifted up the corner of the vehicle to take some pressure off the tire before completely jacking it up. 5. Once all four tires are at least one foot off the ground, place jack stands at each corner under the vehicle's frame. 6. Lower the jack slowly until it has been completely removed from the car. 7. Test to ensure the car is stable and secure before you crawl underneath or start working on it. 8. When finished with your repairs put the jack back in place and slowly raise the car until it is off the jack stands. 9. Remove the chocks or blocks from behind the tires and carefully lower the jack to the ground. Finally, remove the jack completely before driving away. Common Mistakes to Avoid When Lifting an Incline-Moving Vehicle
Some mistakes should be avoided when jacking up a vehicle that could harm you and your vehicle. Let's go over them here: 1. Not using the right equipment: Always ensure that you are using the appropriate jack and other necessary tools for lifting your vehicle, as well as any accompanying instructions from its manufacturer or operator’s manual. 2. Not securing all four wheels: Before raising the car on an incline, it is important to ensure that all four wheels are securely blocked or checked for additional safety. 3. Not ensuring that the jack is securely positioned: Make sure to carefully position the jack at the direction of your vehicle’s manufacturer and double-check that it is securely placed before jacking up the car. 4. Not allowing adequate room to work: When raising a car on an incline, ensure plenty of space around the vehicle so you can move freely while working. 5. Not having someone nearby: It is best to have a second person present during the jacking process for assistance and oversight of the work. By avoiding these common mistakes, you can help ensure your car is safely jacked up on an incline. This can help prevent unnecessary damage and personal harm while providing your vehicle is prepared for whatever task you have in mind. ConclusionTherefore, lifting a car up an incline requires extra care and caution to ensure safety and success. Make sure the ground is level and stable before jacking up the car, use wheel chocks or blocks to prevent the vehicle from rolling, and always use jack stands for extra support. With these tips in mind, you'll be able to jack your vehicle up safely, whether it's on an incline or otherwise.
Floor jacks are an essential tool for any mechanic or DIYer. They are used to lift heavy objects and provide a stable platform for working on vehicles. But do floor jacks need hydraulic fluid? The answer is yes. Hydraulic fluid is necessary for adequately functioning your floor jack and should be checked regularly. Here, we will discuss the type of hydraulic fluid you should use in your floor jack, how often you should change it, and other useful tips. Why Do Some Floor Jacks Need Hydraulic Fluid?Some floor jacks rely entirely on gravity to help lift loads these are known as “gravity-based” jacks, and they do not require any additional lubrication or maintenance. However, many modern floor jacks are “hydraulically-powered,” meaning they use pressure generated by a piston to lift heavier objects more easily. These types of jacks must be filled with hydraulic fluid to function correctly; if the fluid level drops below a certain point, then the jack will no longer be able to lift heavy objects safely. What Type of Hydraulic Fluid Should I Use?
The type of hydraulic fluid depending on the type of floor jack you have. Regular hydraulic fluid with the right viscosity always works well for most floor jacks. However, some models may require a specific type of oil or lubricant, so make sure to check the manufacturer’s instructions before using any fluids in your jack. Additionally, some people recommend using power steering fluid as a substitute for regular hydraulic fluid. Still, it is not recommended due to its high pressure and potential to cause damage to the seals in your jack. How Often Should I Change My Floor Jack Oil?It is recommended that you check your floor jack’s oil level at least once every 12 months or more often if you use it frequently (such as in a workshop setting). If the oil looks dirty or has particles floating in it, then it is time to change it out with fresh oil. Additionally, if there is an odor coming from the oil, then this could indicate that something isn’t quite right, and you should consider changing out the oil as soon as possible. Tips for Keeping Your Floor Jack in Top ConditionIn addition to changing out the hydraulic oil regularly, there are other steps you can take to keep your floor jack in good working condition. 1. Check for any signs of damage or wear and tear on the jack periodically, as well as any hoses or seals that may need replacing. 2. If you use your floor jack in a workshop environment, make sure to store it securely when not in use so that it doesn’t get knocked around by other tools or equipment. 3. Use only the highest quality hydraulic fluid and make sure to keep it topped off at all times. 4. Avoid over-pumping the jack, which can cause damage to the internal parts of the unit, as well as cause a hazardous oil leak. By following these tips and taking proper care of your floor jack, you can help ensure that it will provide reliable and safe performance for years to come. ConclusionMechanics and DIYers need floor jacks, but they require regular maintenance like any other piece of equipment. The most crucial step is ensuring that they have enough clean hydraulic fluid at all times, which will help ensure that they work correctly when needed. Additionally, make sure to inspect all hoses and connections periodically for signs of wear or damage, as well as lubricate all moving parts with grease or oil when necessary. Following these steps will help maintain your floor jack so it can be used safely whenever needed.
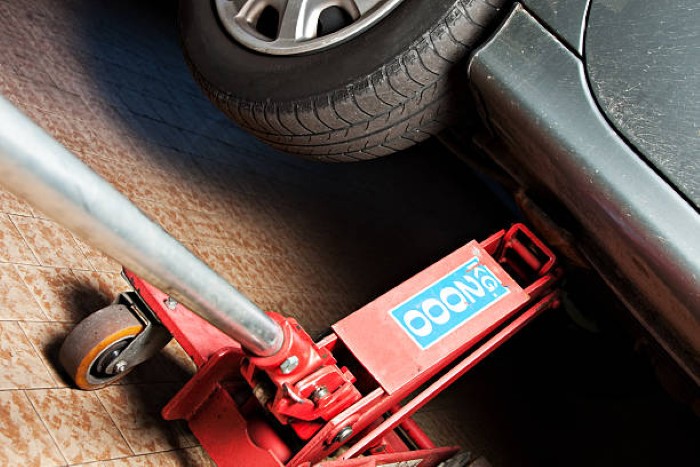
It’s always an irritating experience when you’re in a hurry, and your car jack slowly goes down. This can be caused by several factors, from leaks in the air system to the internal components of the jack. Fortunately, it is possible to fix this annoying problem and avoid having it happen again. In this blog post, we’ll look at what causes car jacks to drop slowly, how to fix it, and steps you can take to prevent it from happening in the first place. What Factors Can Cause a Car Jack to Go Down Slowly?
Several factors could be causing your jack to decline slowly. The most common cause is either an issue with an inner component or air leaking out of the system. To figure out which one is causing your car’s jack to lower slowly, you’ll need to check both parts of the system. Internal Components:When it comes to your hydraulic floor jack for vehicle, if it isn’t going down as quickly as it should, then there may be an issue with one or more of its internal components. These include the oil, seals, springs, and valves inside the cylinder chamber of the hydraulic floor jack. Inspect each part for signs of wear and tear, such as cracks or leaks in seals or valves. If any components are damaged, they will need to be replaced before you can use it again. Leaks in Air System:Another possible cause of slow lowering in the hydraulic floor jack of your car may be air leaking from its system. To test for air leaks in a cylinder chamber, pump some air into the cylinder chamber and listen for leaks around any seal. If you hear leaking air, there is likely a problem with seals that need to be fixed before you can safely operate the hydraulic floor jack. How Can You Fix a Slow-Lowering Car Jack?While it can be intimidating trying to figure out why the hydraulic floor jack on your car is going down too slowly, there are quite a few simple fixes that can help increase its speed and performance. Some easy-to-implement solutions include adding additional oil, checking all seals and valves for damage, and replacing worn parts if necessary. Additionally, ensuring that all air systems within your hydraulic floor jack are properly sealed will help ensure that no air escapes when pumping up or lowering, causing slower lowering times over time. Tips for Preventing Slow-Lowering Car JacksTo prevent your car’s hydraulic floor jack from going down slowly, you should always ensure that it is in good working order before use. Inspect all seals and valves for damage and leaks and replace them with new components if necessary. Additionally, check the hydraulic fluid to ensure its level is sufficient for proper operation. You should also keep your car jack clean and free from debris or dirt, as these can interfere with its performance. When using a hydraulic floor jack, it’s essential to make sure that all of your connections are secure and not loose. Loose connections can cause air to get into the system, which can cause it to lower down slowly. Finally, you should use your car jack on a sturdy and level surface for maximum stability and safety. Avoid using it on soft surfaces such as sand or grass, as these can shift under its weight and affect its performance. These tips can help ensure that the hydraulic wall jack works properly and lowers down quickly. With proper maintenance, you should be able to avoid any slow-lowering issues with your car jack. ConclusionIt’s essential to identify why your car jack is going down slowly so you can take action and get it fixed as soon as possible. Leaks in the air system or worn-out internal components may be responsible for this issue, but fortunately, these are both easily fixed. You should also take steps to prevent slow-lowering jacks, such as regularly checking for signs of wear or damage and maintaining your jack correctly. By following these tips and taking care of your car jack, you're likely to avoid frustrating issues with lowered speed while jacking up your vehicle. 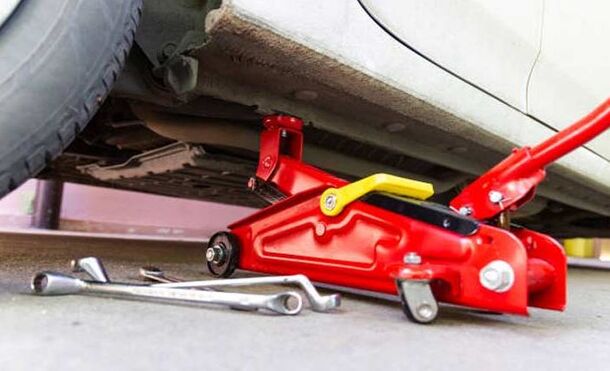
Many people find jacking up their low car daunting, but it doesn’t have to be. Jacking up a low car can be done safely and easily if you know the correct steps and use the appropriate equipment. This blog post will discuss how to properly jack up a low car, including the recommended tools and safety precautions that should always be followed when lifting the vehicle. So, let’s get started. Instruction on How to Get a Jack Under A Low Car
Knowing how to get a jack under a low car is key to performing any necessary maintenance or repairs safely and securely. Here, we will walk you through each step of getting your car lifted properly so that you can take care of any issues quickly and confidently. At GigaWheels, you can find details regarding car jack. Tools Needed for Lifting Low Cars
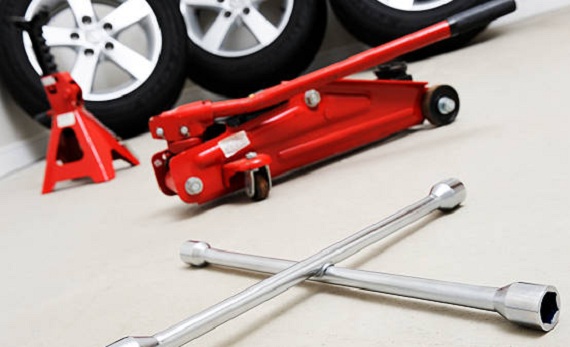
Before you begin jacking up your low car, you’ll need some essential tools that will make the job easier and safer. These include a floor jack designed specifically for automotive use; they come in various types but are typically powered by air or hydraulic pressure; ramps that can be used in place of jacks; wheel chocks; and wrenches or other hand tools in case you need to remove certain parts during maintenance or repairs. Now that you have all your tools together, it’s time to start lifting. The following steps will help you get a safe and secure lift on your low-riding vehicle. Step 1: Positioning Your Vehicle
First, you’ll want to position your vehicle, so it is stable before lifting it off the ground. This includes ensuring there is no debris around it (such as rocks or branches) that could cause instability while raising it, positioning it on flat terrain if possible, and avoiding inclines or declines if possible, as this could make jacking up more difficult. Additionally, if you plan on using ramps rather than a jack for lifting your car off the ground, make sure they are firmly in place before beginning. Step 2: Locating Your Jacking Points
Once your vehicle is properly positioned and ready for lifting, you’ll need to locate its designated jacking points these are reinforced metal ribs at either side of the front wheels (or rear wheels, depending on where you plan on doing repairs). Make sure not only that these points are easily accessible but also clear from any debris, such as dirt or gravel, which may interfere with the proper positioning of your jack/ramps later on. Once everything is cleared away from these points, proceed to step three. Step 3: Positioning Your Jack/Ramps underneath Vehicle
Now that you’ve located both jack points, it’s time to position either a floor jack underneath both sides near each point OR ramps over each side, so they support the entire weight of the vehicle while raised off the ground. If using a floor jack, ensure that both sides are securely positioned underneath each point before attempting to pump them into place use caution when pumping as overexertion may cause damage to underside components such as exhaust pipes, etc. If using ramps, assist in ensuring they are placed beneath both sides of the vehicle before beginning the pumping process. Also, ensure wheel chocks are in place behind wheels whenever using ramps. Step 4: Pumping Until the Vehicle Is Raised Off Ground
Once everything is securely positioned beneath the vehicle (either steps 2-3), now comes the time for the actual lifting process. Using either floor jack/ramp, begin lifting until vehicle is high enough for repair work (usually about one foot above ground level). Make sure not to exceed the manufacturer weight limit/pump too hard when creating a lift as this could damage underside components -stop pumping once desired height has been reached, and then proceed to the next step. Step 5: Perform Necessary Repairs/Maintenance
After reaching the desired height, now, it’s time to perform necessary repairs/maintenance. Ensure everything underneath is clear, and then begin replacing parts needed remember always to wear appropriate safety gear such as gloves/mask when handling complicated components like engines, etc. Then replace the faulty part(s) once complete, replace any protective covers which were removed prior & recheck the entire area making sure nothing was missed during repair work. Finally double, check everything is secure & back away lowering it down onto a flat surface before driving away. Safety Tips When Lifting Low-Riding Vehicles
To ensure your repairs or maintenance are done safely and efficiently, it’s important to follow the proper protocols for lifting these cars. Here are eight essential safety tips to keep in mind when working with low-riding vehicles. 1. Always ensure proper safety equipment, such as gloves, masks, and protective eyewear, when performing repairs or maintenance underneath the vehicle. 2. If using ramps instead of a jack, secure wheel chocks firmly behind each wheel before beginning repairs/maintenance. 3. Make sure the parking brake is engaged, and the transmission is in park or neutral before lifting a car with a jack. 4. When operating a floor jack, ensure it’s on level ground and firmly secured before raising the vehicle. This will help ensure that the car’s weight won’t cause the jack to slip. 5. When raising a low-riding vehicle with a floor jack, use caution when positioning it, as the lower clearance of the car can lead to pinching or other damaging forces if not done correctly. Use common sense and be careful. 6. After successfully getting your jack under the car, raise the vehicle no more than necessary. The higher you go, the weaker the jack’s support becomes, and it could fail suddenly without warning. 7. Double-check that all equipment is secure before working under a low-riding car; this includes ensuring all tools are accounted for and that nothing is within reach of the vehicle. Always use caution when working on lowered cars, and remember to keep safety in mind at all times. This way, you can get your car repairs done quickly and safely. ConclusionRemember to take all necessary safety precautions when jacking up a low car, such as using wheel chocks and following manufacturer instructions for any tools used. With proper preparation and knowledge, you can quickly and safely lift and lower the vehicle to perform maintenance or repair work. We hope we’ve given you all the information to start lifting your low car. |